Contents
- The Hardware
- Step 1: Choosing the Tablet
- Step 2: The Wall Mount
- Step 3: Routing the USB Cable Inside the Wall
- Step 4: Installing and Configuring Fully Kiosk Browser
- Installation
- Essential Configuration
- Home Assistant Integration
- Step 4b: Preserving the Battery with a Smart Plug
- The Automations
- Step 5: Automatic Wake-Up on Approach
- Enabling Motion Detection in Fully Kiosk
- Step 6: The Home Assistant Dashboard
- What I Wanted to Do: the Tablet as a Video Intercom
- A Wall Tablet to Control a Smart Home?
- The Result
- Useful Links
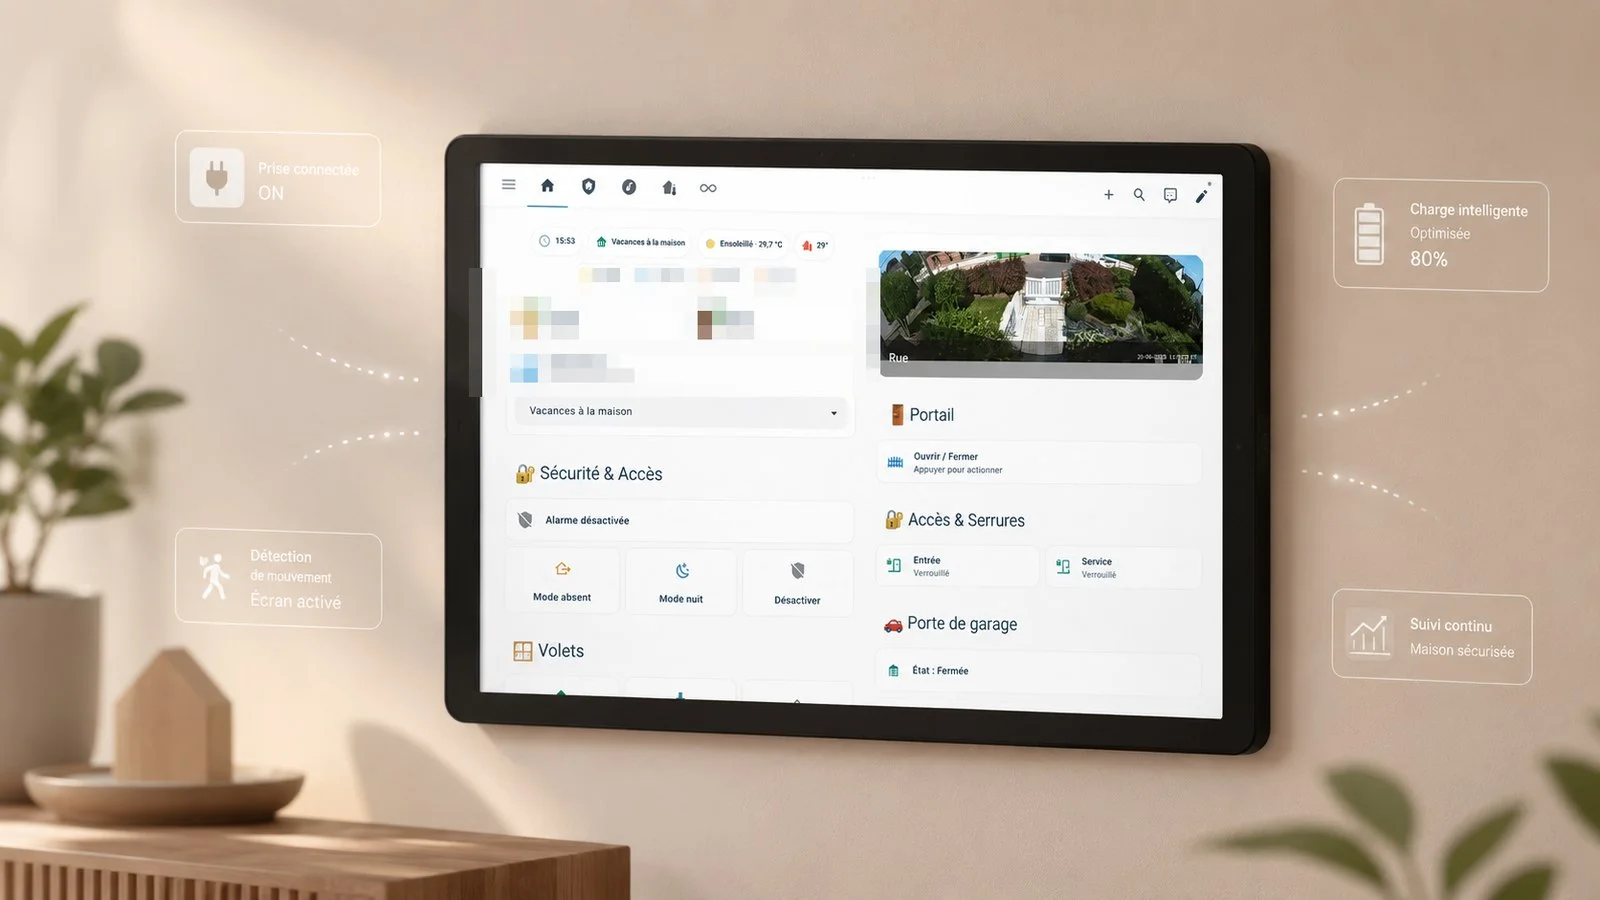
Ever since I got Home Assistant, I’ve been looking for a central control point in the house — something always visible, always available, without having to reach for your phone. A wall-mounted tablet turned out to be the obvious answer. Here’s how I built the whole thing from start to finish.
The Hardware
- Tablet: Xiaomi Redmi Pad SE 11” (8 GB / 256 GB), purchased for €133.99 on AliExpress
- Wall mount: Route Lisi Designs, model-specific mount for the Xiaomi Redmi Pad SE 11”, €49.90
- Power: USB-C cable routed inside the wall
- Software: Fully Kiosk Browser (~€6.90 per device licence)
- Home Assistant side: dedicated dashboard built in the HA interface
No extra hub, no exotic integration. The tablet simply connects to the home Wi-Fi and accesses Home Assistant via its local URL.
Step 1: Choosing the Tablet
The Xiaomi Redmi Pad SE 11” is an excellent value-for-money option for this use case:
- 11-inch screen → readable at a distance, comfortable to tap
- Snapdragon 680 processor → plenty for an HA dashboard, no lag
- 8000 mAh battery → even on permanent charge, heat stays manageable
- Stock Android → Fully Kiosk compatible without restrictions
I bought it in 8 GB / 256 GB on AliExpress for €133.99. The 128 GB version is more than enough for this purpose, but the 256 GB wasn’t much more expensive at the time.
One thing to watch: permanent charging (24/7) can slightly accelerate battery aging. Fully Kiosk handles this by capping the charge at 80% through a dedicated setting. More on that below.
Step 2: The Wall Mount
I went with a model-specific mount rather than a universal one: the Wandhalterung Xiaomi Redmi Pad SE 11” from Route Lisi Designs, a German maker that produces made-to-order mounts for various tablet models.
€49.90 for a piece of plastic is clearly steep. But the result speaks for itself: the mount fits the tablet perfectly, it clips in cleanly and doesn’t budge. I had to make a few small adjustments to fit my specific wall setup, but nothing deal-breaking.
If budget is a concern, alternatives exist on Printables or MakerWorld — search “Xiaomi Redmi Pad SE 11 wall mount”. You’ll need a 3D printer or an on-demand printing service.
Step 3: Routing the USB Cable Inside the Wall
This is the step that takes a bit of work but makes all the visual difference. Zero visible cable = an installation that looks like it was planned from the start.
In my case I got lucky: I already had a hole in the wall made for the power feed of my video intercom screen. I used that existing passage to also run the tablet’s USB-C cable. Result: no extra cutting, no drilling, cable completely invisible.
If you’re starting from scratch:
- Drill a hole behind where the tablet will sit
- Run a USB-C cable to the nearest power outlet (under skirting boards or through a wall chase)
- Power it via a flush-mounted USB outlet or a charger hidden in the electrical box
Quick alternative: a cable duct painted to match the wall colour remains a much simpler option and is perfectly acceptable visually.
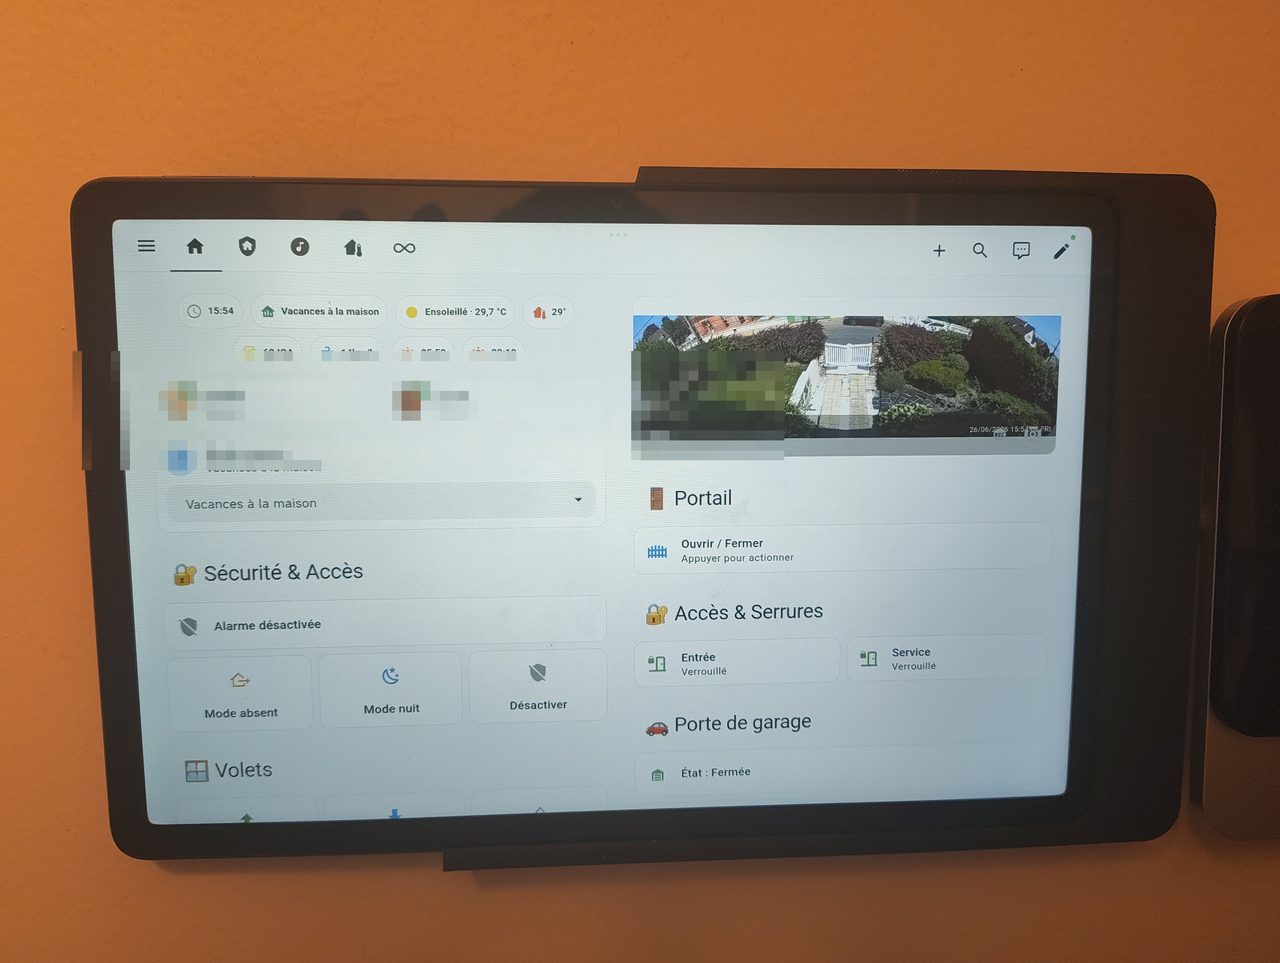
The USB-C cable emerges discreetly behind the mount and plugs into the tablet before clipping it in.
Step 4: Installing and Configuring Fully Kiosk Browser
Fully Kiosk is the essential tool for turning an Android tablet into a permanent kiosk display. It prevents the user from leaving the app, handles automatic screen wake-up, and integrates natively with Home Assistant.
The app has a free version, but it gets limiting quickly: front-camera motion detection and the REST server (which lets Home Assistant control the tablet) are features reserved for the Fully Kiosk PLUS licence, at around €6.90. These are precisely the two features that make this setup worthwhile. Without them, you just have a browser locked to full screen. The licence is lifetime and per device, which is reasonable.
Installation
- Download the APK from fully-kiosk.com directly on the tablet (or via ADB)
- Enable “Unknown sources” in Android settings if needed
- Install the APK and launch Fully Kiosk
Essential Configuration
In Settings → Kiosk Mode:
- Start URL:
http://[YOUR_HA_IP]:8123(your local Home Assistant address) - Kiosk Mode: enabled (prevents leaving the app)
In Settings → Device Management:
- Keep Screen On: enabled
- Screensaver / Screen Off: set the delay to your preference (2 minutes of inactivity → screen off works well)
In Settings → Remote Administration:
- Enable the local REST server → lets Home Assistant control Fully Kiosk (turn screen on/off, reload page, etc.)
- Note the IP and port (e.g.
http://[TABLET_IP]:2323)
Home Assistant Integration
Add the Fully Kiosk Browser integration from Settings → Devices & Services → Add Integration. Enter the tablet’s IP, port (2323) and the Fully Kiosk admin password.
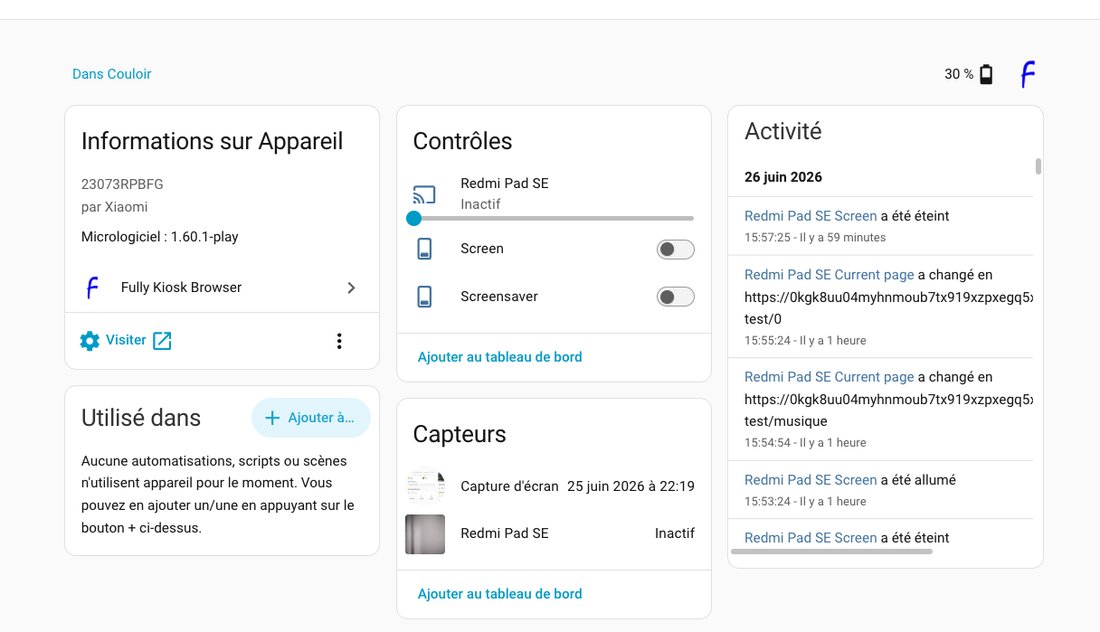
HA then exposes entities to turn the screen on/off, check battery level, trigger an audio alarm, etc. The battery level sensor is the key piece for the next step.
Step 4b: Preserving the Battery with a Smart Plug
A tablet isn’t designed to stay plugged in permanently. Leaving the battery at 100% on continuous charge irreversibly degrades the cells over time. Within a few months, battery life can drop significantly.
The software approach (capping charge at 80% in Fully Kiosk) isn’t enough: it prevents the battery from exceeding 80%, but the charger stays connected continuously, generating heat and stress on the cells.
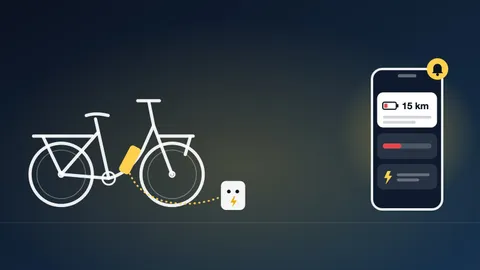
I went with a cleaner approach: a Sonoff Zigbee S60ZBTPF smart plug paired with a Home Assistant automation that physically cuts power when the battery is charged enough, and restores it when it drops too low. The battery cycles between 30% and 85%, never stressed at the extremes.
.jpg)
The Automations
I created two separate automations — easier to read and maintain than a single one with branching logic.
Hallway Tablet — Start Charging: turns the plug on as soon as the battery drops below 30%. A condition prevents turning the plug back on if it’s already active.
View YAML code
alias: Hallway Tablet - Start Charging
description: Turns on the tablet plug if battery drops below 30%
triggers:
  - trigger: numeric_state
    entity_id: sensor.tablette_battery_level
    below: 30
conditions:
  - condition: state
    entity_id: switch.prise_tablette
    state: "off"
actions:
  - action: switch.turn_on
    target:
      entity_id: switch.prise_tablette
mode: single
Hallway Tablet — Stop Charging: cuts the plug as soon as the battery exceeds 85%. Same logic: a condition checks the plug is actually on before turning it off.
View YAML code
alias: Hallway Tablet - Stop Charging
description: Turns off the tablet plug if battery exceeds 85%
triggers:
  - trigger: numeric_state
    entity_id: sensor.tablette_battery_level
    above: 84
conditions:
  - condition: state
    entity_id: switch.prise_tablette
    state: "on"
actions:
  - action: switch.turn_off
    target:
      entity_id: switch.prise_tablette
mode: single
sensor.tablette_battery_levelis the battery sensor exposed by the Fully Kiosk integration.switch.prise_tabletteis the Sonoff Zigbee plug in the hallway.
Step 5: Automatic Wake-Up on Approach
This is the feature that makes the setup genuinely pleasant day-to-day: the screen stays off at rest and turns on automatically when you walk up to it. And the best part is that you need no external sensor. Fully Kiosk uses the tablet’s front camera directly to detect movement.
Enabling Motion Detection in Fully Kiosk
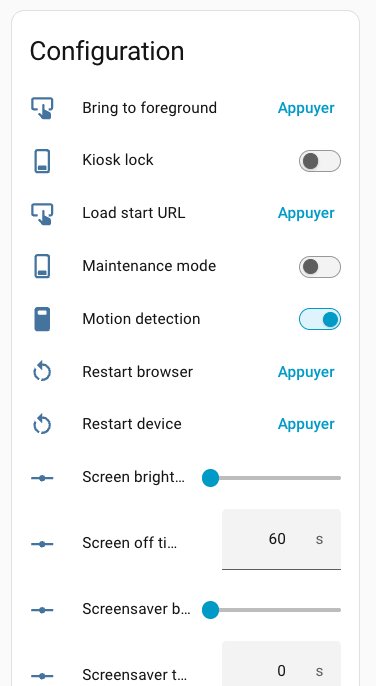
In Settings → Motion Detection:
- Enable Motion Detection: on
- Turn Screen On on Motion: on
- Motion Sensitivity: adjust to your environment (start at 50%)
- Turn Screen Off After (seconds): 60 seconds in my setup
Fully Kiosk analyses the front camera feed locally to detect any change in the image. No data is sent externally. The screen wakes up in under a second.
Once configured, these settings are also visible and controllable directly from the device page in Home Assistant:
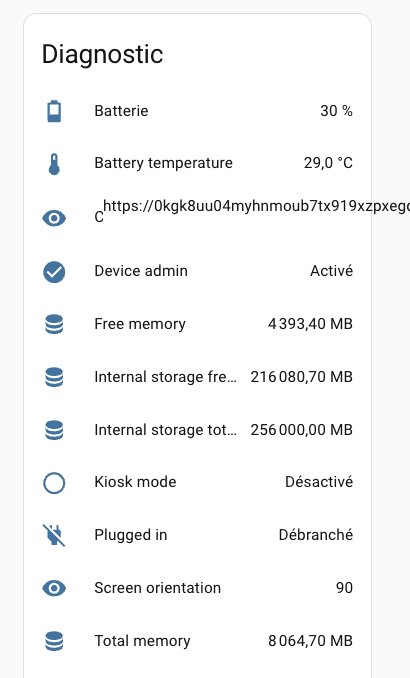
Beyond convenience, this anticipatory detection has a real practical benefit: it gives the tablet a few seconds to load content before you’re standing in front of it. Camera feeds in particular have a slight startup lag, and the screen already being on when you arrive makes a noticeable difference.
I initially tried a different approach: a double tap on the screen to wake it. Simple to set up but not at all satisfying in terms of responsiveness. You’d tap, wait, tap again. Front-camera detection completely solves this.
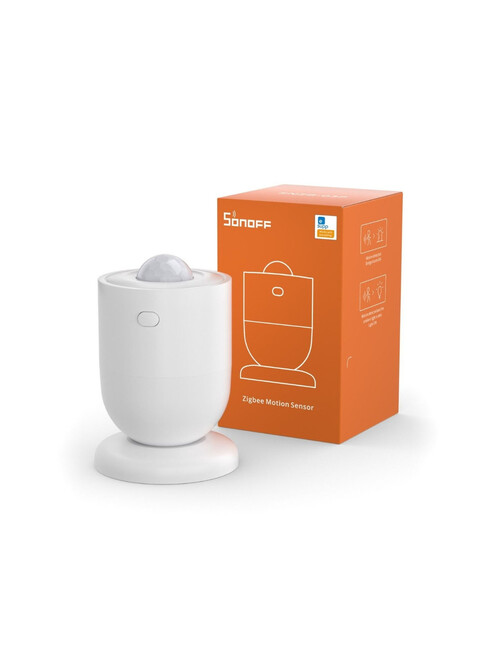
⚠️ Update: I eventually disabled front-camera motion detection. It was draining the battery too quickly, even when not actively in use. I switched to an automation triggered by a Sonoff Zigbee motion sensor placed in the hallway — same responsiveness, negligible battery impact.
Step 6: The Home Assistant Dashboard
I created two dashboards in Home Assistant: one for the wall tablet, one for mobile. The tablet dashboard is organised into 5 views accessible via tabs.
Home View: the main view, the one you see walking past. At the top, a chips bar permanently shows the time, active house mode, local weather, living room temperature, air quality index, wind speed and sunrise/sunset times. Below: household member presence, house mode selector, Somfy alarm, blinds (living room, kitchen, entrance), multi-day weather forecast, a street camera preview, gate and garage door controls, entrance and service door locks, and a bin collection block showing upcoming pickups (general waste, recycling, garden waste, bulky items).
Security View: dedicated to surveillance. Chips show alarm status, camera state (privacy mode or not), gate, doors, windows. Full feeds from six cameras are directly accessible: street, terrace, garage, service door, entrance, living room. Alarm modes (away, night, disarm) are reachable in one tap.
Heating View: Tado control room by room. Day areas (living room, dining room, kitchen, office) and night areas (bedrooms), plus heated towel rails ground floor and upstairs. Chips show outdoor and indoor temperature in real time, number of zones heating and open windows.
Music View: Spotify and NAD amplifier control, with shortcuts to frequently used playlists.
Misc View: robot vacuums (with floor plan for each level), robotic mower, appliances (dryer, washing machine, dishwasher), outdoor lighting, and an office/garage block for humidity, dehumidifier and bike charger.
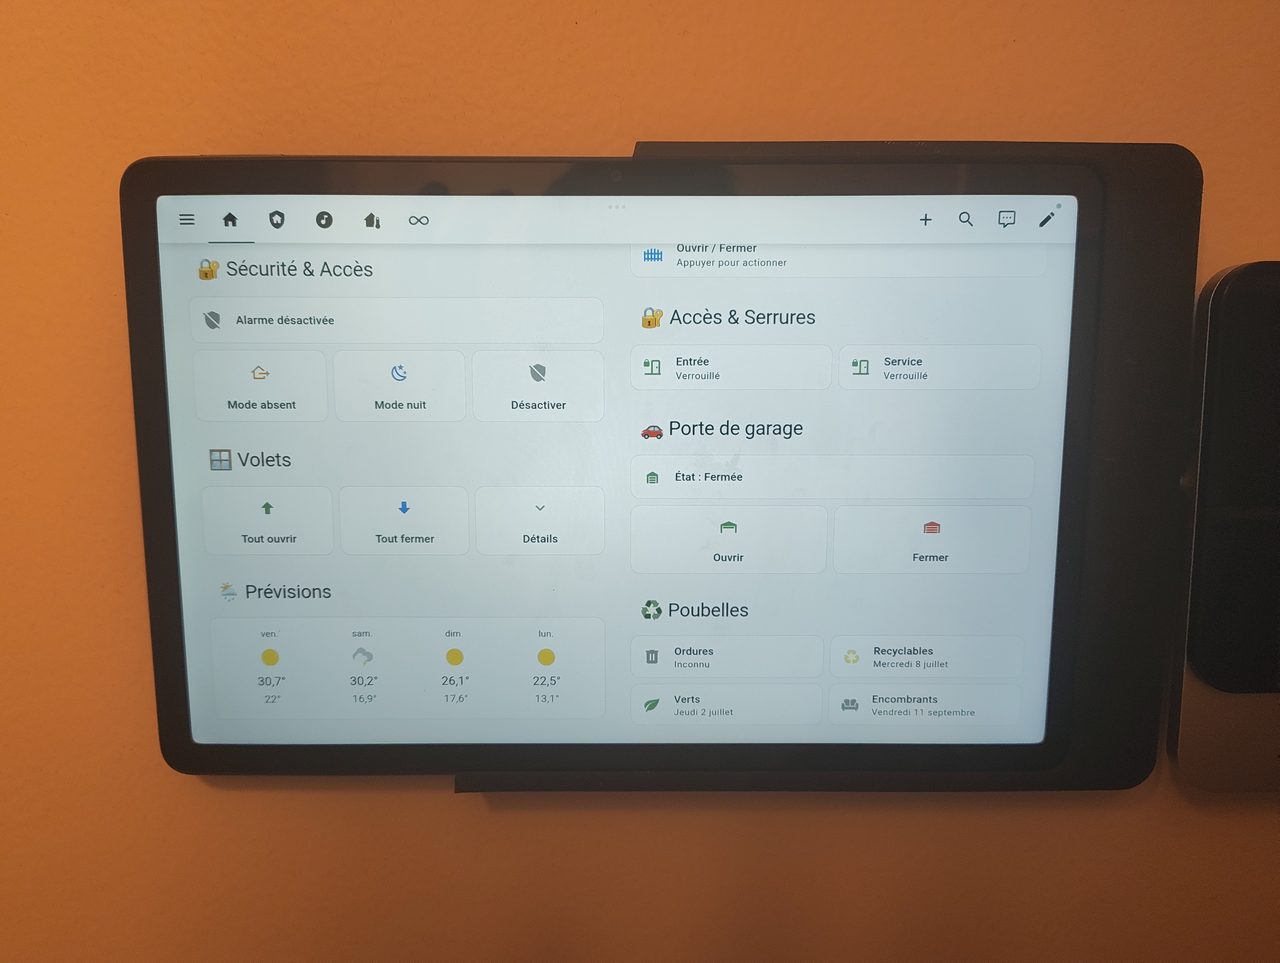
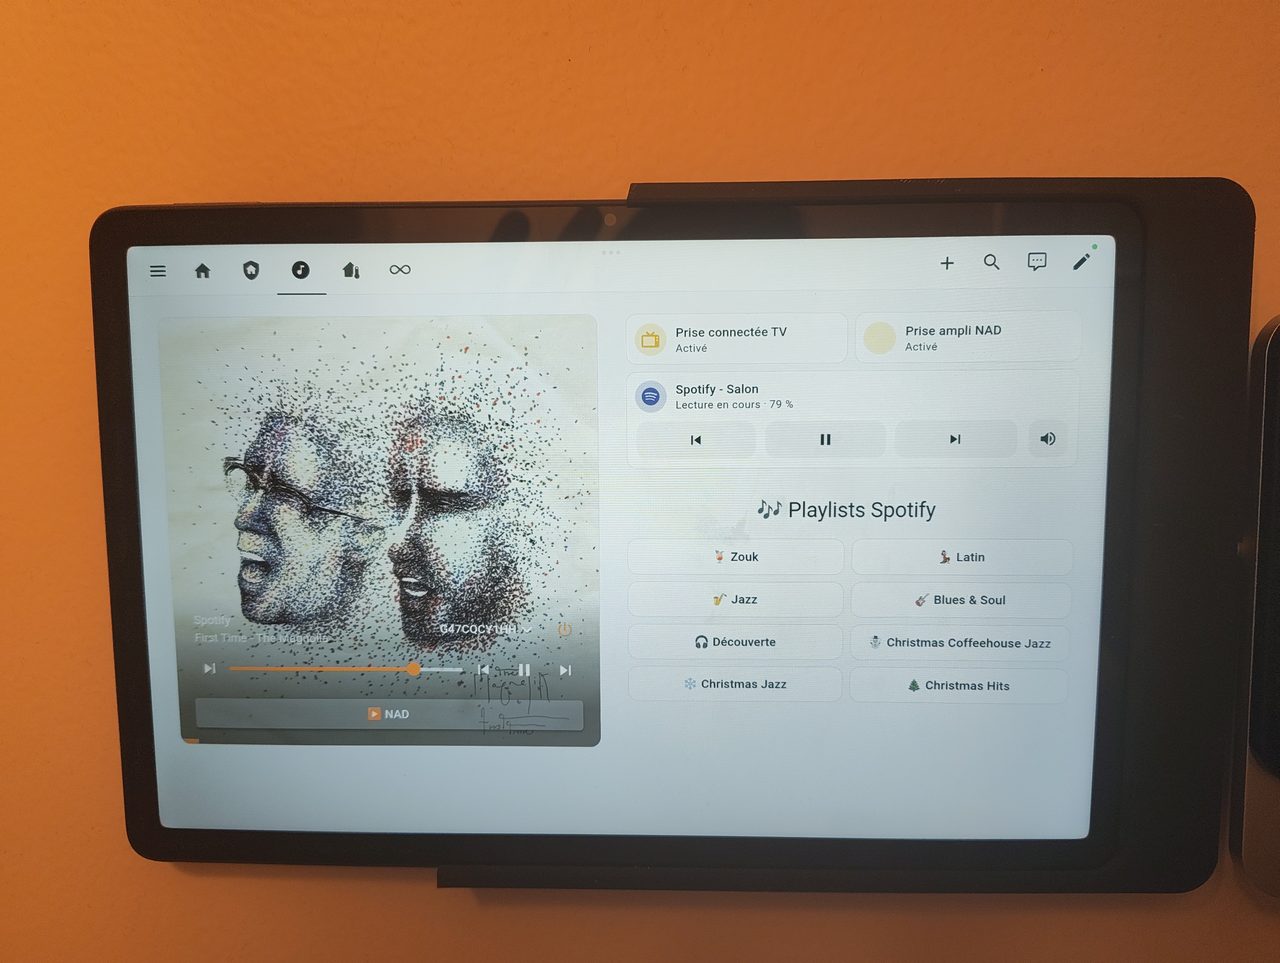
On layout: the wall tablet format demands wide cards and generous buttons. Everything needs to be readable and tappable from around 1.5 metres away.
What I Wanted to Do: the Tablet as a Video Intercom
Before I started, I had one idea in mind: use this tablet as a video intercom. The concept was to go through a Reolink intercom compatible with Home Assistant: when someone rings, the tablet automatically shows the door camera feed and lets you talk to the person.
Except it doesn’t work. And not because HA can’t technically do it, but because no intercom on the market offers native two-way audio through Home Assistant. You can receive the video feed, see the person, but to talk you have to pick up your phone and open the dedicated app. Exactly what we wanted to avoid.
There are a few workarounds: solutions using WebRTC, proxies, custom integrations. It’s a real rabbit hole. And for something as critical as an intercom (it needs to work every time, without thinking), a fragile solution isn’t viable. I dropped the idea and the tablet stays what it does very well: a control dashboard.
This is a genuine gap in the market. If anyone finds a clean solution, I’m interested.
A Wall Tablet to Control a Smart Home?
My honest take: no, it’s not essential. I lived without one for a long time and the house worked perfectly fine.
The best automation is the one that requires no input. When the blinds open by themselves at sunrise, when the alarm disarms after detecting my phone coming home, when the lighting adjusts without me touching anything — that’s the goal. Having to tap a tablet or reach for your phone to trigger something is ultimately adding a layer of mental overhead where you wanted to remove one.
So why do I have one anyway?
Because some use cases are genuinely well solved by a fixed, always-visible tablet:
- Positioned next to the intercom, it lets you open the gate, unlock the garage door and trigger the entrance lock in a single tap, without looking for your phone
- Walking past in the morning, a glance is enough to see today’s weather and indoor temperatures. No need to pull out the phone, the info is already there
- When guests are over in your absence, the tablet gives them full autonomy: open the blinds, control what they need without having to call me or install an app
It’s not the heart of the smart home setup, it’s a practical complement for situations where full automation isn’t possible or doesn’t make sense. And honestly, I think it looks cool.
The Result
The setup has been running for several weeks without a single issue. The tablet wakes up when you walk past, shows what you need to see, and turns itself off. The in-wall cable gives a clean finish. The mount holds perfectly.
This installation marks a real turning point for me: for the first time, I feel like my smart home is reliable and complete. I know that’s an illusion: a Home Assistant setup is never really finished and never will be 😅. But having a physical, permanent, wall-integrated control point… it changes something in how the whole system feels.
Total cost:
| Item | Price |
|---|---|
| Xiaomi Redmi Pad SE 11” (8 GB / 256 GB) | €133.99 (AliExpress) |
| Route Lisi Designs mount | €49.90 + €6.99 shipping |
| Fully Kiosk Browser (licence) | ~€7 |
| USB-C cable + accessories | ~€10 |
| Total | ~€208 |
The mount represents 28% of the total budget for a piece of plastic. It’s the only real downside of this build. But for something that’ll be screwed to the wall for years, I preferred a perfect fit over an approximate solution.
Useful Links
- Fully Kiosk Browser: full documentation and download
- Route Lisi Designs: model-specific wall mounts for tablets
- HA integration: search “Fully Kiosk Browser” in the official Home Assistant integrations
Questions about the setup? Comments are open below.

.CUeYkqze_Z1gen0s.webp)